Disclaimer
All screenshots in the article were taken in the Dutch version of Yuki.
With the Yuki Assistant NL app for your smartphone, as an entrepreneur, you have direct access to your own domain with one or more administrations in Yuki.
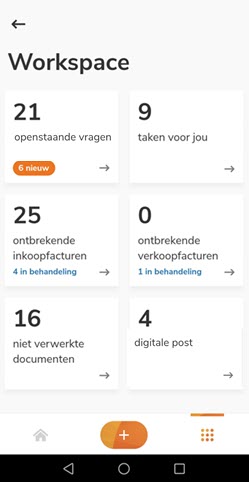
Yuki constantly monitors whether the accounting and administration are complete and up-to-date. The Workspace displays a number of items that require your attention:
- Outstanding questions
- Task for you
- Missing purchase invoices
- Missing sales invoices
- Not processed documents
- Digital mail.
Review these matters carefully and also take action on them after you've reviewed them. Take action where necessary so that your Workspace is always an indication of what you still need to do to keep your accounting in order.
Outstanding questions
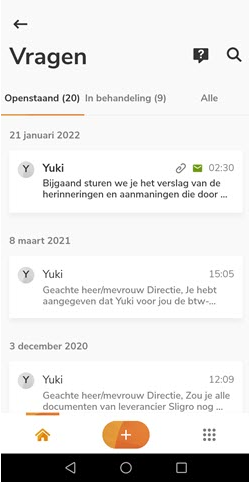
Here you can view and/or handle your outstanding questions, the outstanding questions for your accountant (in process), or all questions.
When you view all the questions, you can specify whether all questions or only those from a specific calendar year, half-year, quarter, month, or a custom period you enter should be shown.
Additionally, you can search for a specific question by the person who created the question or the content of the question.
Ask a new general question
To ask a new general question to your accountant, click on the question mark in the top right corner of your screen. In the now-opened screen, type your message, optionally add a document from the archive via the paperclip, and then click on Send.
TIP!
In addition to being added from the Yuki Archive, a document can also be added to a question from a folder on your smartphone, from the Gallery, or by taking a photo.
Notification from Yuki or the accountant
You can handle a notification from Yuki or your accountant, or forward it to another user by clicking on Forward or Completed at the bottom of your screen.
Question asked by your accountant
You can forward a question asked by your accountant to another user by clicking on Forward at the bottom of your screen. You can answer the question by clicking on Reply at the bottom of the screen. In the now-opened screen, type your answer/response and then click on Send.
ATTENTION!
When the 'VAT return approval by the customer' setting is activated in the domain, a VAT return that you need to approve can be approved by clicking on the Approve button. This will cause the VAT return to be sent directly to the tax authorities.
Question answered by your accountant
You can mark a question answered by your accountant as resolved by clicking on Completed at the bottom of your screen. You can answer the question by clicking on Reply at the bottom of the screen. In the now-opened screen, type your answer/response and then click on Send.
Tasks for you

Here you can view your outstanding tasks, your outstanding tasks for other users (in the queue), or the tasks you have completed (history).
ATTENTION!
Absence requested by an employee and requiring approval from a manager will also appear in the list of outstanding tasks (task 'Approve absence') for the relevant manager.
You can filter the tasks shown on your screen by:
- Priority
- Type/Task type
- Date.
Create new task
To create a new one, click on the plus sign in the top right corner of your screen. In the now-opened screen, select the type of task you want to create (Task or Release for payment), enter the task details, and then click on Create.
For a detailed description of task types, see the article Task types.
TIP!
In addition to being added from the Yuki Archive, a document can also be added to a task from a folder on your smartphone, from the Gallery, or by taking a photo.
Complete tasks
In the 'For Me' list, the name of each task you need to handle, the user who created the task, the user for whom the task is intended, the task type, and the status of the task are shown, among other things.
Additionally, if applicable, the subtasks within the task and the attachments (attached document) are shown, among other things.
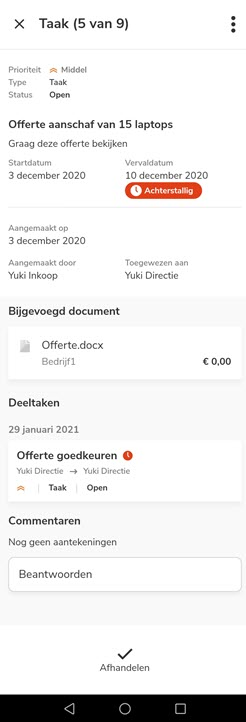
Handle your outstanding task.
Open an outstanding task. You now have several options to complete the task:
- Complete
You indicate that you have completed the task and thus closed it by clicking on Close at the bottom of your screen. - Edit
You can change the task data. You do this by clicking on the three dots in the top right corner of your screen and then clicking on Edit at the bottom of your screen. - Reassign (Forward)
You can assign the task to another user, e.g., to a colleague for a 'double-check'
You do this by clicking on the three dots in the top right corner of your screen and then clicking on Reassign at the bottom of your screen. In the now-opened screen, search for and select the user to whom you want to forward the invoice for approval, and then click on Assign again. - Delete
You can delete the task. You do this by clicking on the three dots in the top right corner of your screen and then clicking on Delete at the bottom of your screen.
TIP!
If you want to make a note for yourself or another user about this task, type your text in the Comments section at the bottom of your screen and then click on Send. Then click on Complete, Reassign, or close the task by clicking on the cross in the top left corner. Your text will then be saved with this task and is always visible to all users who open this task.
Handle outstanding absence registration (task)
Every employee can create an absence registration in Yuki. When a manager has been assigned to an employee, this manager must approve or reject each new absence registration.
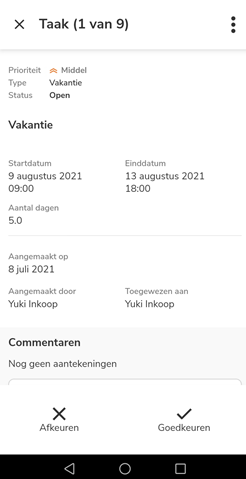
Open an outstanding absence registration; you now have several options to handle the absence request (task):
- Approve
You approve the employee's requested absence by clicking on Approve at the bottom of your screen. - Reject
You reject the absence request by clicking on Reject at the bottom of your screen.
You can provide a reason why this absence request was not approved and is therefore rejected. - Edit
You can change the task data. You do this by clicking on the three dots in the top right corner of your screen and then clicking on Edit at the bottom of your screen. - Reassign (Forward)
You can assign the absence request to another user, e.g., to a colleague for a 'double-check'.
You do this by clicking on the three dots in the top right corner of your screen and then clicking on Reassign at the bottom of your screen. In the now-opened screen, search for and select the user to whom you want to forward the virtual registration for approval, and then click on Assign again. - Delete
You can delete th task. You do this by clicking on the three dots in the top right corner of your screen and then clicking on Delete at the bottom of your screen.
TIP!
If you want to make a note for yourself or another user about this task, type your text in the Comments section at the bottom of your screen and then click on Send. Then click on Approve, Reject, Reassign, or close the task by clicking on the cross in the top left corner. Your text will then be saved with this task and is always visible to all users who open this task.
For a detailed description of using different types of tasks in Yuki, see the article Tasks.
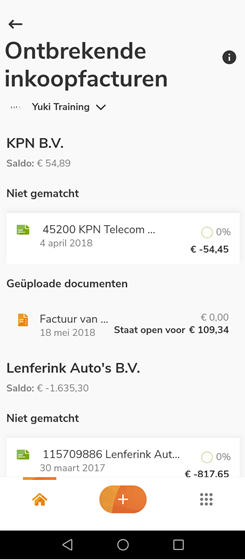
Missing purchase and/or sales invoices
Here you can view the following information per contact:
- the outstanding payments or the payments in transit (the purchase and/or sales invoice has been uploaded but not yet processed) for which the corresponding purchase and/or sales invoices are missing according to Yuki.
- the uploaded purchase and/or sales invoices that have not yet been matched with a payment.
Process outstanding payment
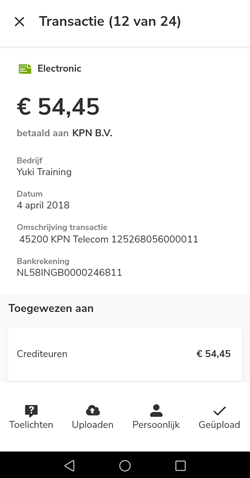
Open an outstanding payment and then click at the bottom of your screen on:
- Explain
Provide your accountant with an explanation of the payment. For example, the purchase or sales invoice might already be present in the administration but has been incorrectly booked under a different supplier or customer. - Upload
Please submit a missing purchase or sales invoice. - Personal (only available on purchase invoice)
Please indicate here for which user this payment was a private expense. - Uploaded
Indicate that you have now provided the purchase or sales invoice.
For a detailed description of the completeness of purchases or sales, see the article Completeness of purchase or Completeness of sales.
Not processed documents
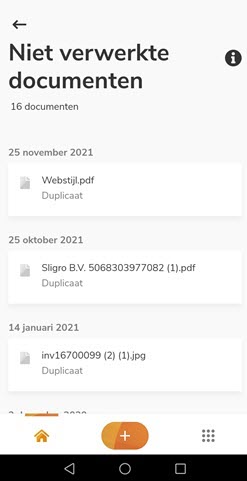
Here you will find a list of documents that have been marked as 'not processed' by the back office. Sometimes a specific document or bank file cannot be processed. This can have various causes:
- the document is incomplete.
- the file contains multiple invoices or receipts.
- the document is completely or partially illegible.
- the document has already been submitted and processed.
- the file cannot be opened by Yuki.
- the import file contains incorrect data.
- according to Yuki, the document doesn't need to be processed in the administration.
- the document has been marked as spam.
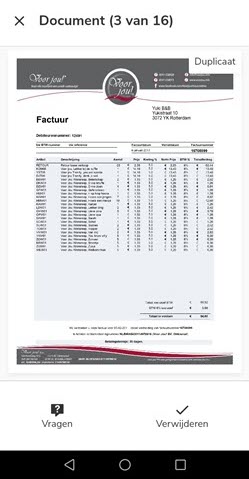
Handle not processed document
Open an unprocessed document and then at the bottom of your screen click on:
- Ask
Ask your accountant a question if you disagree with the conclusion that the document cannot be processed. The document will be automatically linked to your question
Provide a brief explanation or additional information about the document so it can still be processed. - Upload (not available for Duplicate cause) a new, complete, or improved version of the document.
- Remove
Remove a document that was correctly not processed or after you have resubmitted a document.
For a detailed description of the not processed documents, see the article Files not processed.
Digital mail
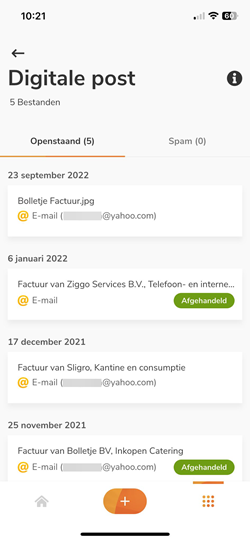
Here you can see a list of documents that have been submitted to Yuki from an external source. These are, for example, emails that have been sent to your Yuki email address. You can also find the documents submitted via Dropbox and Google Drive here. Documents you have scanned or uploaded yourself are not included in this list.
This list is a signal list! All documents received will be processed by your accountant in the administration. The documents that have already been processed in your administration have the status 'Processed'.
Handle received file
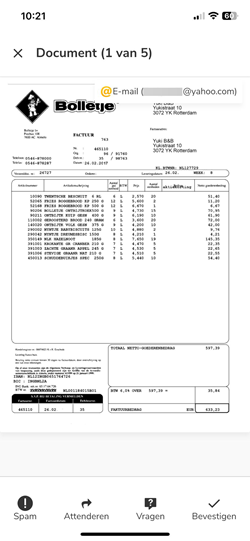
Open a received file and then click at the bottom of your screen:
- Spam (only available when received via email)
Mark a file received via email as spam. The file is then placed in the Spam folder, and the sender is added to a so-called blacklist. From this point on, all emails from this sender will be automatically placed in the Spam folder.
For a detailed description, see the articles Spam and Spam settings. - Notify
Select the user who should be notified about this received file, and then click on Forward. No further details can be added. - Ask
Ask your accountant a question about this incoming file and then click on Send. - Confirm
You have reviewed the received file and agree. The file will now disappear from this list.
Was this article helpful?
That’s Great!
Thank you for your feedback
Sorry! We couldn't be helpful
Thank you for your feedback
Feedback sent
We appreciate your effort and will try to fix the article