Disclaimer
All screenshots in the article were taken in the Dutch version of Nmbrs Accounting.
Direct debit mandates that have been created but are still awaiting the customer’s signature and for which the final start date is missing are grouped under Outstsnding requests. Here, you can download the official PDF for signing and upload the signed document as soon as it is returned.
Sign and finalize SEPA direct debit mandate
Step 1. Open SEPA direct debit mandate
To open a SEPA direct debit mandate:
- click on the Bank icon on the navigation bar
- click on Collect
- then, in the now-opened screen, under Mandates click on Outstanding requests
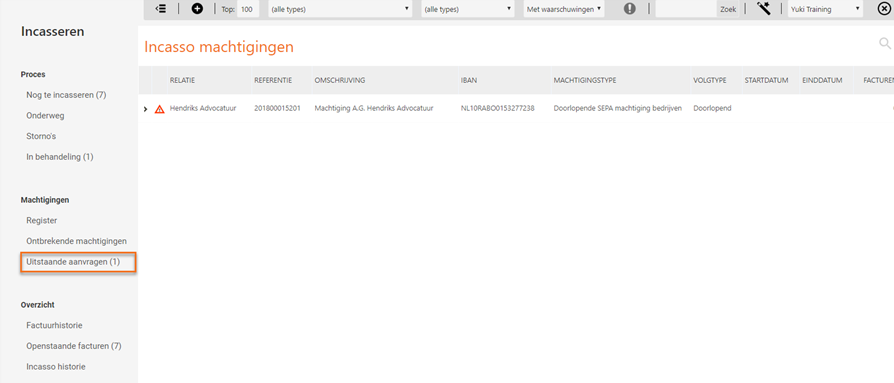
- open the direct debit mandate that has to be signed by the contact by clicking > in front of the relevant direct debit mandate.
Step 2. Generate and send PDF
When saving an authorization, Nmbrs Accounting automatically generates a document containing all the required SEPA information.
To generte and send the PDF:
- click on the Printable version button to download the PDF file or print it directly
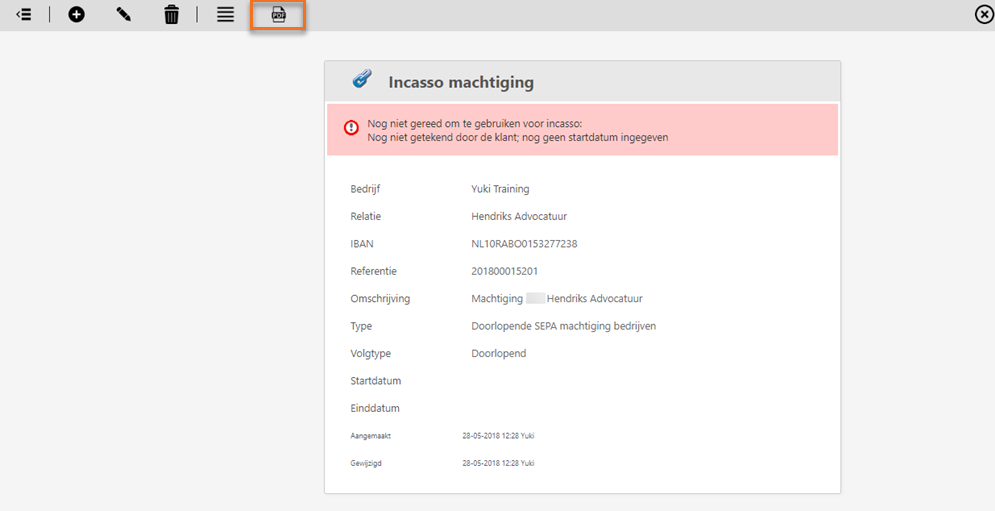
- send this PDF to the customer via email or mail for their signature.
Step 3. Register signed mandate
As soon as the signed authorization is received:
- reopen the mandate via Outstandnig requests (or via the Registry)
- in the Start date field, enter the date the customer signed (this date must not be later than the first direct debit date)
- upload the signed file using the Document field to archive it digitally right away
click on Save.
Don't forget the bank!
Depending on your type of SEPA direct debit contract (particularly for B2B / business mandates), the signed mandate must also be registered with the debtor's bank before the first direct debit can be processed successfully.
Was this article helpful?
That’s Great!
Thank you for your feedback
Sorry! We couldn't be helpful
Thank you for your feedback
Feedback sent
We appreciate your effort and will try to fix the article