Disclaimer
All screenshots in the article were taken in the Dutch version of Yuki.
In Yuki, transactions from purchase and sales invoices can be linked to a project from an opened GL account.
These transactions can even be split so they can be allocated to different projects.
The chart of accounts can be opened from various locations within Yuki:
- Hover your mouse over the Financials icon in the navigation bar and then click on Chart of accounts.
- Click on the Back office icon in the navigation bar and then click on Chart of accounts in the now-opened screen.
Only a user with the 'Financial administration' or 'External accountant' role can link invoice lines to different projects.
Then open the general ledger card for the relevant costs, purchase, or revenue account.
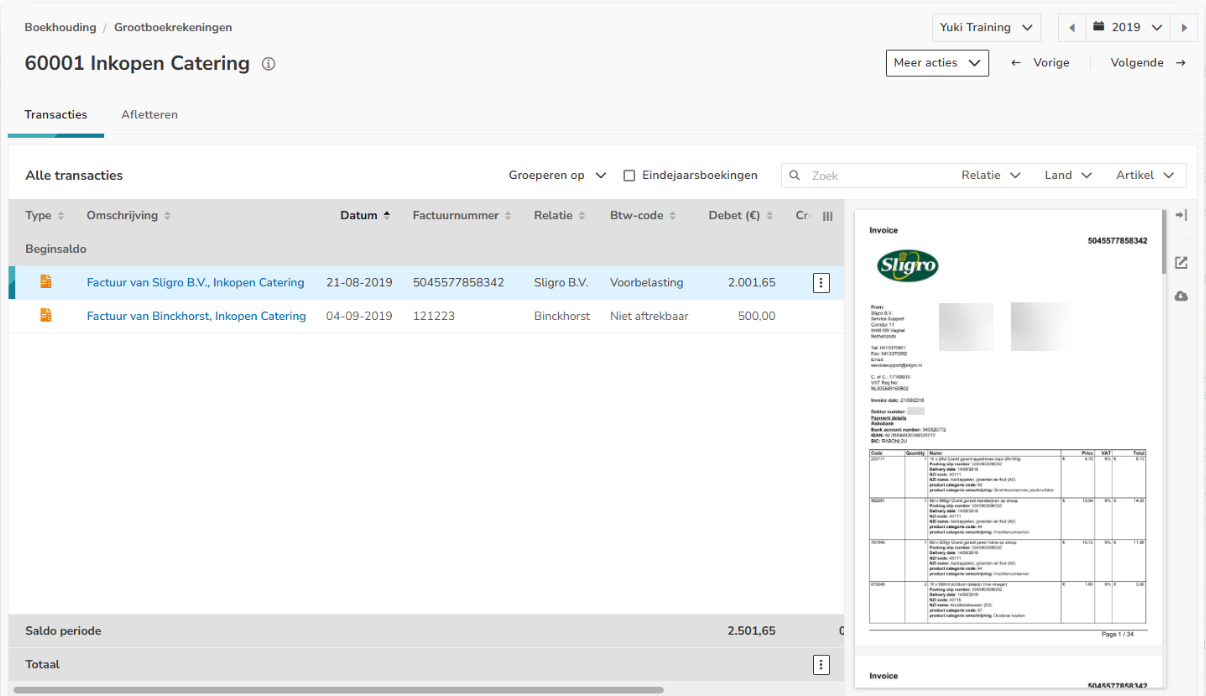
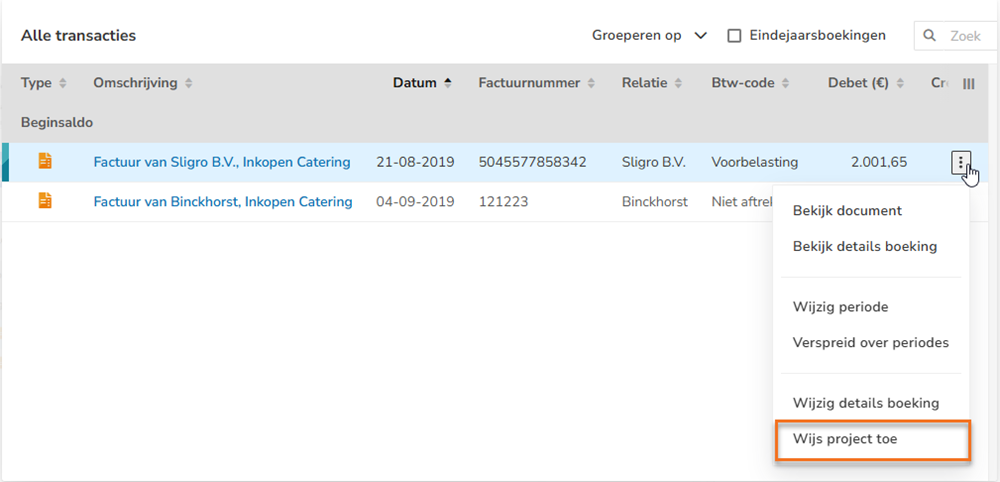
Click on the button with the three dots behind the relevant invoice and select the Assign project option from the now-opened menu.
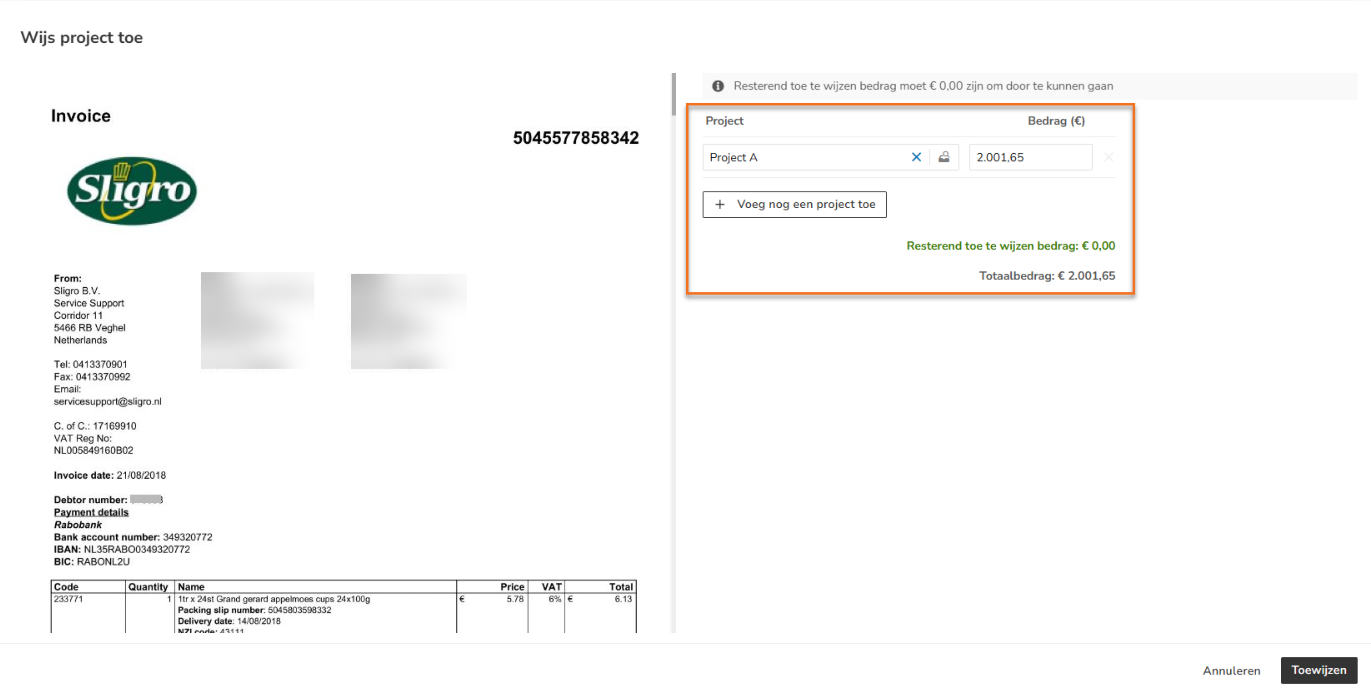
In the now-opened screen, click on the Select icon in the Project field and select a project to link the invoice transactions to a project.
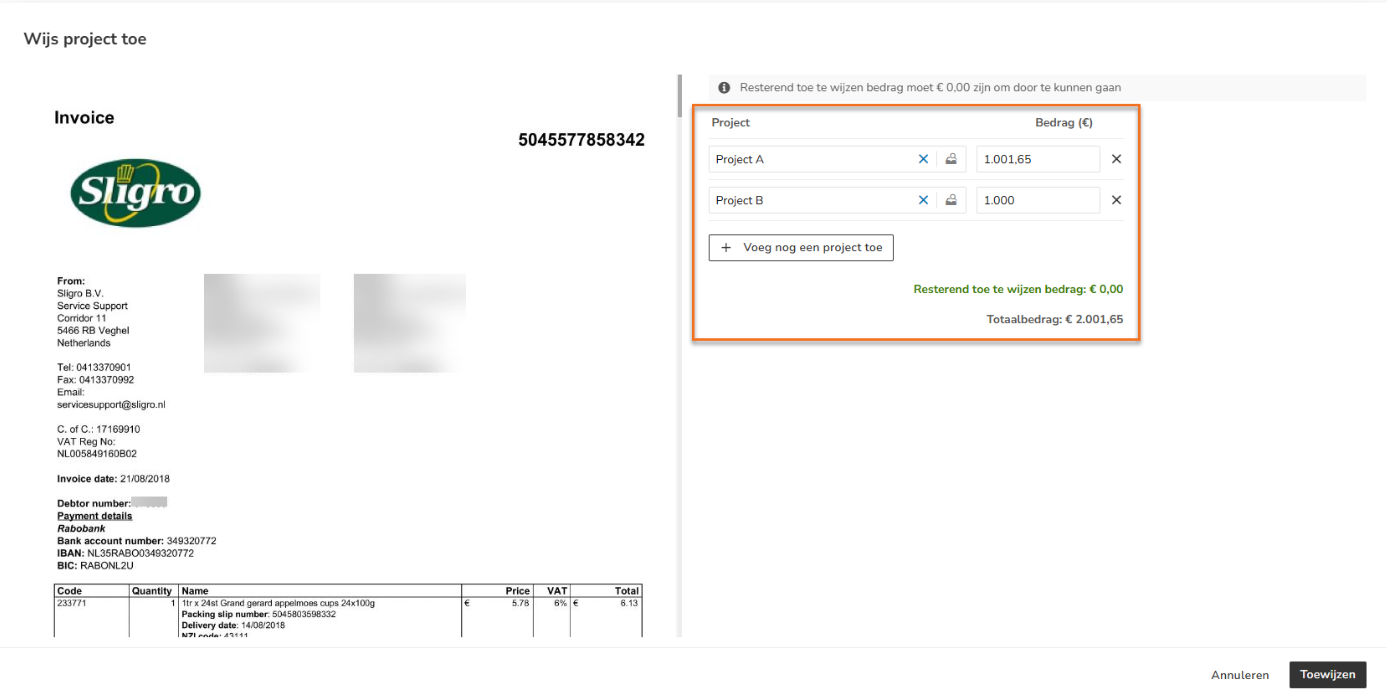
If you want to assign the transactions of a purchase or sales invoice to two or more projects, click on the Add another project button. A second line is shown where you can allocate the remaining amount to another project. This way, you can split a transaction line and link it to different projects.
ATTENTION!
The transaction splitting is undone again if the invoice is reprocessed or if another action is performed on the project, such as changing the GL account or moving it to another year or month. So make sure you perform those actions first before splitting the transaction.
Was this article helpful?
That’s Great!
Thank you for your feedback
Sorry! We couldn't be helpful
Thank you for your feedback
Feedback sent
We appreciate your effort and will try to fix the article