Disclaimer
All screenshots in the article were taken in the Dutch version of Yuki.
To further improve the automatic document processing rate (based on IDR and if activated Maximum Recognition) in Yuki, document match rules can be created in a domain based on OCR data found in a document. OCR stands for Optical Character Recognition or in Dutch, optical character recognition (reading text from an image).
For a detailed description of IDR, see article Automatic document recognition (IDR).
For a detailed description of Maximum Recognition see article Activate Maximum recognition.
On the basis of this recognized data, the document type and contact of a document is determined, among other things.
Only a user with the 'Back office' role in a domain can create local OCR match rules.
A local OCR match rule can be created from two places in Yuki:
- click on the Archive icon in the navigation bar, click on OCR match rules and then on the Create OCR match rule button in the now-opened screen
- In the entry screen of a document in Yuki, you will find OCR match rules in the fixed Document section. Click on OCR match rules.

Then in the now-opened screen, click on the New record button.
To create an OCR match rule, go through the following steps:
- search OCR data used as criteria (from document entry screen)
- enter the criteria of the OCR match rule
- determine the result of the OCR match rule
- change, if necessary, the priority of the OCR match rule.
Find OCR data used as criterion for OCR match rule
To search for the OCR data that you want to use as a criterion, click on OCR details in the entry screen of a document under the fixed Document section.
The following is opened:

This displays the OCR text found in the document.
Find a line of text with unique OCR data and copy the entire line of data found. So do not omit data found in the entire line.
Enter criteria of OCR match rule
To start entering the criteria of the new OCR match rule, click on the Create OCR match rule button.
ATTENTION!
All fields are applied as AND criteria. Thus, entering multiple criteria will reduce the result of the OCR match rule.
The following screen is opened:

Then paste after Contains line the copied text line with the OCR data. Click on the Add criteria button to add up to two more lines of text with OCR data as criteria, if required.
Click on Additional criteria if you want to use the following additional criteria, if required:
- CoC number: in this field it is possible to include a Chamber of Commerce number as criteria.
- VAT number: this field allows you to enter a VAT number as criteria.
- Website: this field allows you to enter a website as criteria.
- IBAN: this field allows you to enter an IBAN as criteria.
Determine result of OCR match rule
If the OCR data found by Yuki in the document matches the entered text line with OCR data in the OCR match rule then the selected result will be applied in the document. The document type will be changed and the document will be linked to the entered contact and/or project.
- Document type(required): one of the six document types must be chosen as the result of the match rule. The available document types are:
- Purchase invoice
- Sales invoice
- Bank statement
- Pay slip
- Payroll tax assessment
- Expense claim.
- Contact: if a contact is selected here then the document is linked to the entered contact.
- Project: by entering a project code here the document can be automatically assigned to the corresponding project.

ATTENTION!
The default values of the contact (for document type 'Purchase Invoice' or 'Sales Invoice') will also be filled in automatically.
Then click on the Create button.
The OCR match rule is created and can be found in the OCR match rule overview.
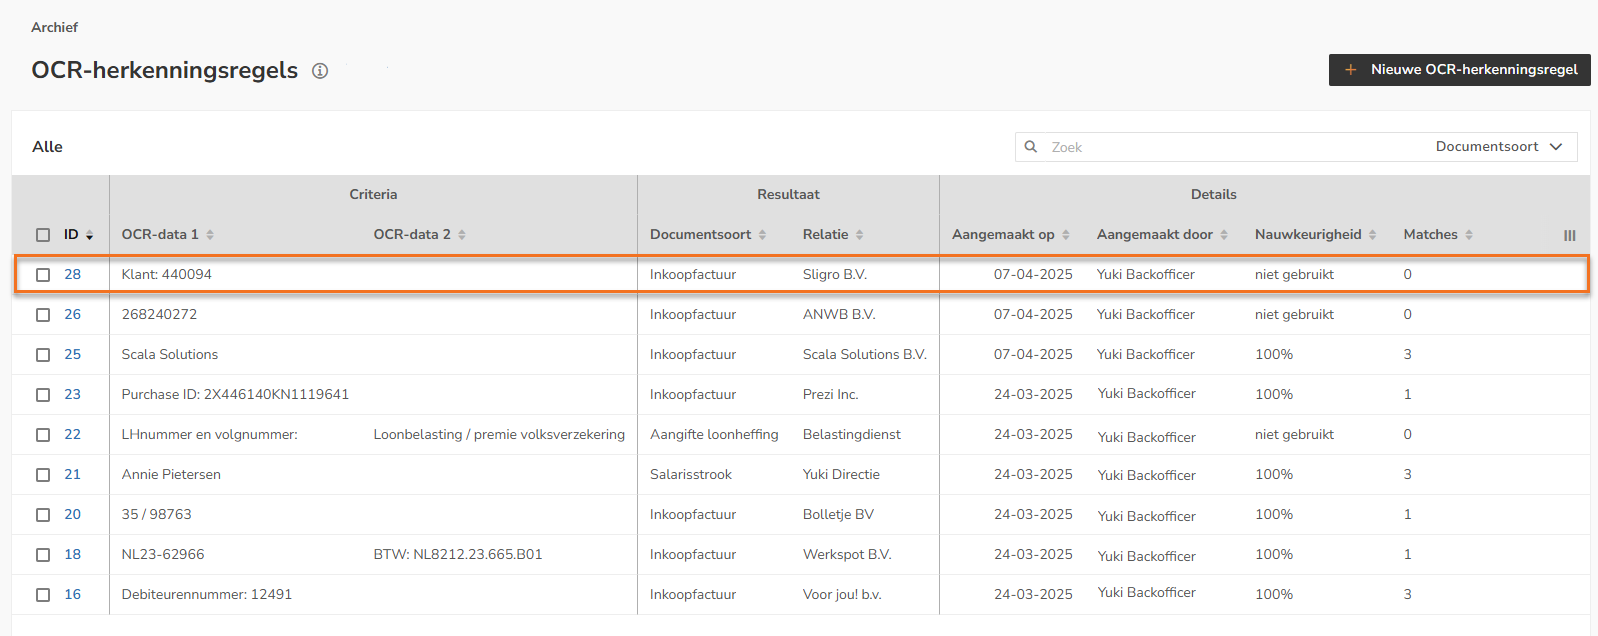
Change priority of OCR match rule
By changing the priority of an OCR match rule it is possible to give certain match rules priority over other match rules e.g. when using multiple match rules with partly the same data criteria.
By default, each OCR match rule has the highest priority (1).
Hover your mouse over the line of the particular OCR match rule whose priority you want to change. Click on the button with the three dots and then select the Edit OCR match rule menu option from the dropdown menu.

Select the desired priority in the Priority field where 1 is the highest priority and 9 is the lowest.
Then click on the Save button.
Was this article helpful?
That’s Great!
Thank you for your feedback
Sorry! We couldn't be helpful
Thank you for your feedback
Feedback sent
We appreciate your effort and will try to fix the article