Disclaimer
All screenshots in the article were taken in the Dutch version of Yuki.
In Yuki, you can view an overviews of all active sales items.
Before you can create and process sales invoices in Yuki, you must first create sales items.
A created sales item is always automatically added to the price list of the selected administration in a domain.
Access to Sales items
To access:
- click on the Sales icon in the navigation bar
- click on Sales items.
Sales items overview

In this screen you will see an overview of all sales items that are currently active in your domain or in one of the administrations.
Views
You can also indicate in this screen that the view Archived should be shown:
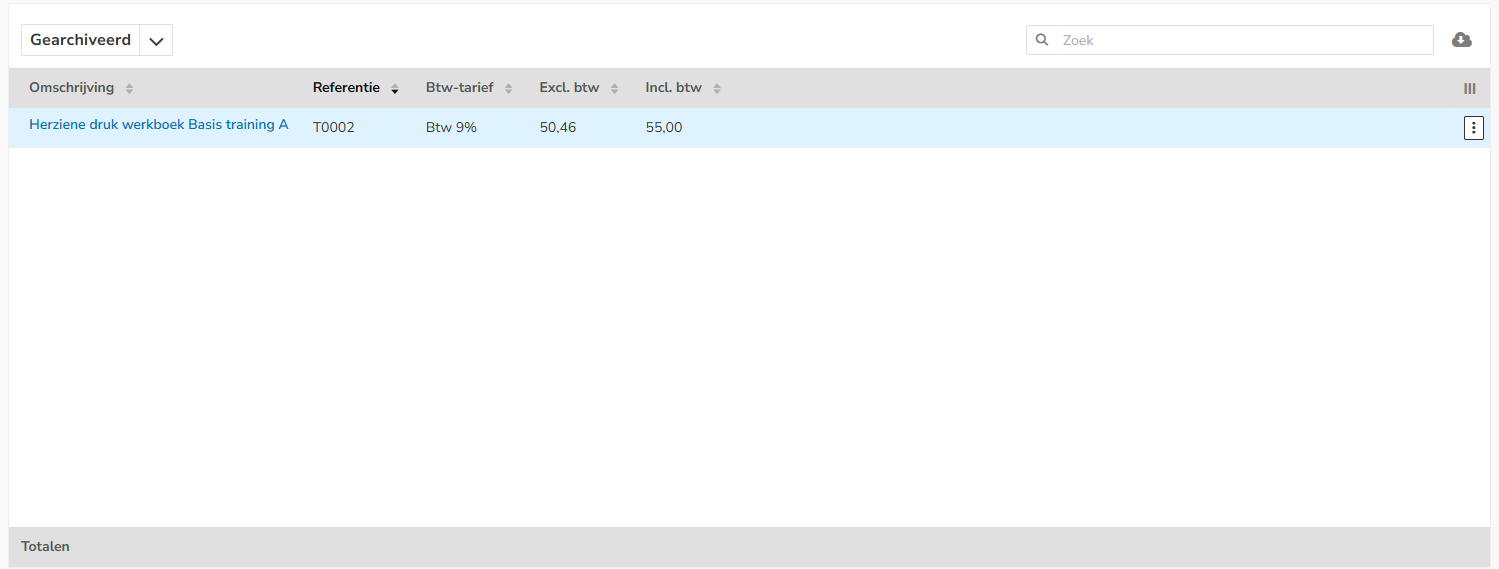
In this screen you will see all the sales items that are currently archived in your domain or in one of the administrations.
AVAILABLE USER ACTIONS
From this overview, a user can:
- create a new sales item
- archive a sales item
- delete a sales item
- move a sales item to another company (administration)
- download all shown columns as a CSV file (Excel).
Create new sales item
To create a new sales item, click the New sales item button.
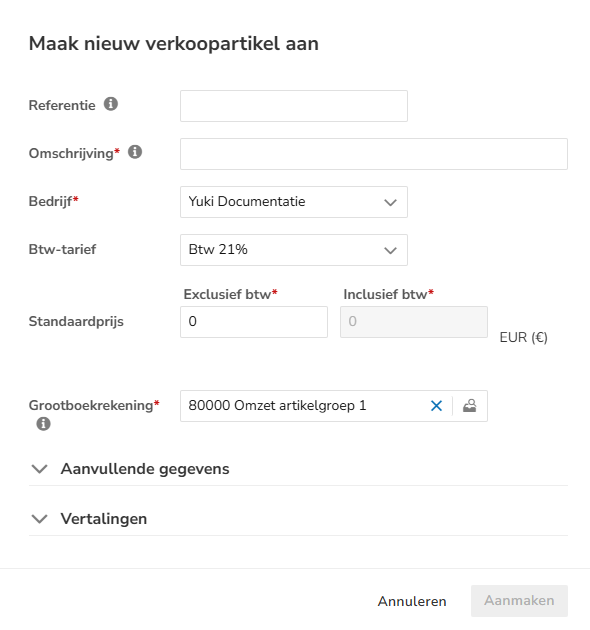
For a detailed description of the fields to be entered, see article Sales Standard - Create sales item.
Archive sales item
To archive a sales item
- open the Active view
- hover over the line of the sales item you want to archive
click on the button with the three dots
then select Archive from the dropdown menu.

OR- click on the description of the sales item you want to archive
- then, in the now-opened screen, click on the Archive button
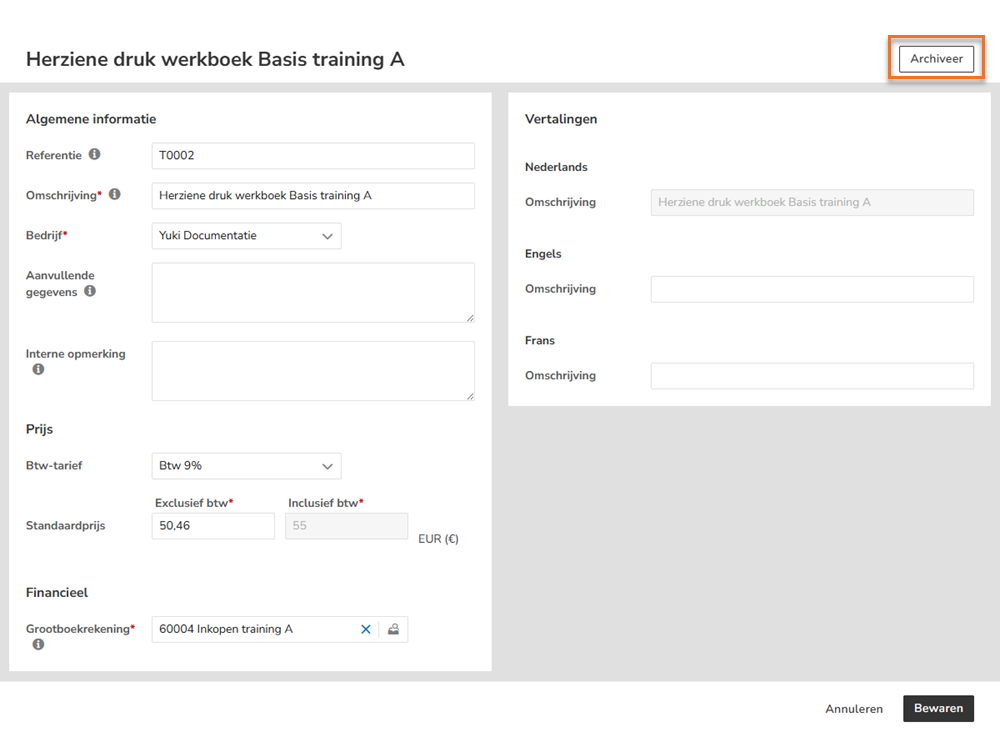
The following message appears on the screen:

The archived sales item has now disappeared from the active sales items overview and is now in the archived sales items overview.
Restore archived sales items
To reactivate an archived sales item for use in your sales invoices:
- open the Archived view
- hover over the line of the sales item you want to restore
click on the button with the three dots
then select Restore from the dropdown menu

OR- click on the description of the sales item you want to restore
- then, in the now-opened screen, click on the Restore button
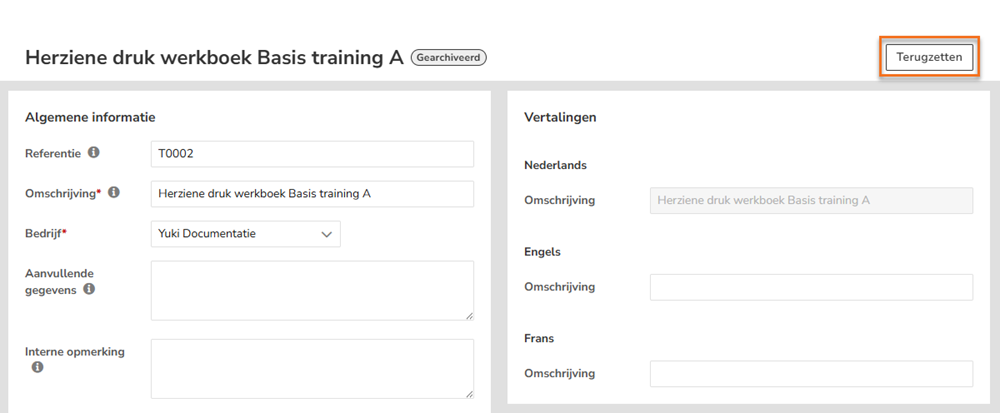
The sales item is now back in the active sales items overview.
Delete sales item
A sales item can only be deleted if the item is not yet included in a draft or finalized sales invoice.
To delete a sales item:
- open the Active view
- hover over the line of the sales item you want to delete
click on the button with the three dots
then select Delete from the dropdown menu.

The following message appears on the screen:

The deleted sales item has now disappeared from the active sales items overview.
Move sales item to another company (administration)
To move a sales item to another company, click on the description of the item in question.
The following screen is opened:

Select the company to which the sales item should be moved, then click on the Save button.
Download data as CSV file
To download all the columns shown in the screen, click on the Download as CSV button (Cloud icon with down arrow).

The name of the downloaded CSV file is 'Sales items.csv'.
Was this article helpful?
That’s Great!
Thank you for your feedback
Sorry! We couldn't be helpful
Thank you for your feedback
Feedback sent
We appreciate your effort and will try to fix the article