Disclaimer
All screenshots in the article were taken in the Dutch version of Nmbrs Accounting.
The Workflow rules featureis only available when a user with the 'Management' role has chosen the Medium, Large or Unlimited bundle via the Store in the domain.
Workflow rules allow you to automatically assign a task to a specific user within the domain after a document has been processed. This is done based on the information in the document (such as supplier, amount, or category).
This is particularly useful for:
- Bringing a document directly to the attention of a specific colleague.
- Automatically submitting invoices for approval prior to payment.
Permissions and roles
Only a user with the 'Back office' role in the domain or the 'Management', 'Financial administration' or 'External accountant' role can create a workflow rule.
Access to Workflow rules
To access:
- click on the Archive icon in the navigation bar
- then click on Workflow rules.
Create workflow rule
To create a new workflow rule:
- in the overview of workflow rules, click on the + New button in the upper-left corner
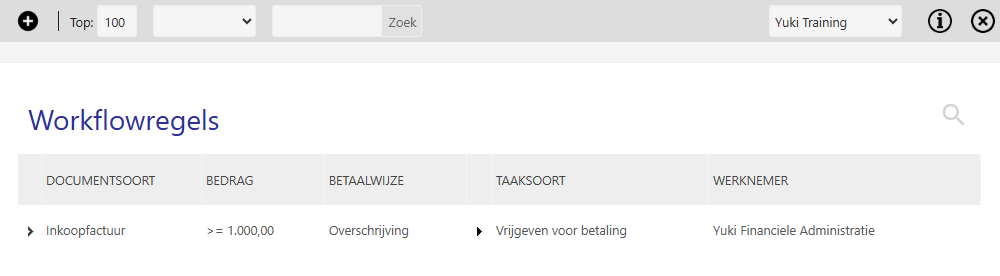
The following screen is opened: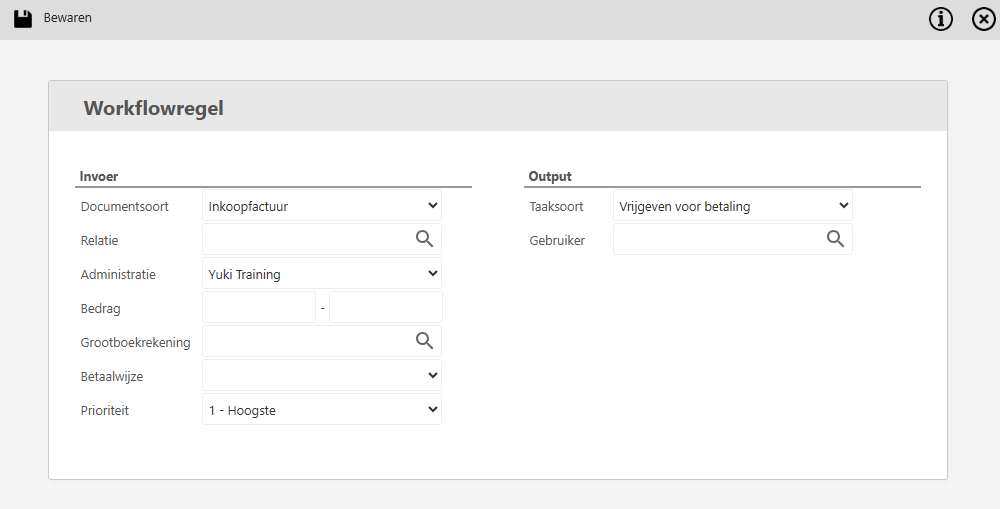
A rule consists of two parts: the Input (the conditions) and the Output (the action).
Input (Define criteria)
Here, configure the conditions a document must meet before the workflow rule takes effect:
- Document type: Select the document type. Currently, Purchase invoices and Expense claims are supported.
- Contact (optional): Select a specific supplier or employee. Leave this field blank if the rule should apply to all contacts.
- Company (optional): Select the administration to which the rule applies. Leave this field blank if the rule should apply domain-wide.
- Amount: Specify a threshold amount.
Example: Should invoices up to €10,000 go to colleague X and those above that amount go to colleague Y? If so, create two separate rules:- Rule 1: 0 to 10,000
- Rule 2: 10,000 to (leave the end amount blank)
- GL accoiunt (optional): Link the rule to a specific GL account (e.g., assign all documents in the Marketing Expenses account to the marketing manager).
- Payment method (optional): Filter by payment method, e.g., if only documents with the status Electronic transfer' need to be reviewed.
- Priority: Determines the order of execution when a document meets multiple rules at the same time.
TIP!
Assign a lower priority to general default rules (for example, priority 4 or 5).
Example: Assign the highest priority (priority 1) to specific exception rules (such as “All invoices over €10,000 must always be sent to management for approval”).
Output (Assign task)
Specify what should happen once a document meets all of the above criteria:
- Task type: Select the type of task that should be created automatically (e.g., Approve for payment).
- User: Specify who the task will be assigned to:
- If, in Step 1 (Approve), you specified that the task type must be created by a user selected manually, you can specify which user that is here in the workflow rule.
- Should a task be assigned dynamically (such as automatically to the project manager of the linked project)? In that case, configure this directly within the settings of the task type itself.
ATTENTION!
The assigned user does not need to be registered as an employee in the system, but must have access to the relevant system.
Was this article helpful?
That’s Great!
Thank you for your feedback
Sorry! We couldn't be helpful
Thank you for your feedback
Feedback sent
We appreciate your effort and will try to fix the article