Disclaimer
All screenshots in the article were taken in the Dutch version of Yuki.
Uploading means copying files from your computer’s hard drive to Yuki’s online servers. The original file remains on your computer; Yuki receives a digital copy in your online domain.
Permissions and roles
Almost any user can upload files from the Archive.
Exception
A user with the “Viewer” role does not have permission to upload documents.
Where do uploaded documents go?
You can upload files in various ways and to different locations within Yuki:
- directly to the bookkeeping or a personal folder.
- directly to a specific subfolder.
Bundle bin
Some uploaded documents are first placed in the bundle bin.
Why the bundle bin? Sometimes a single invoice or document consists of multiple separate pages (scans). In the bundle bin, you manually combine these separate pages into a single complete document.
Only after bundling do these documents enter the workflow, from where they can be processed by the accountant.
Upload files to bookkeeping or personal folder
To upload files to a folder:
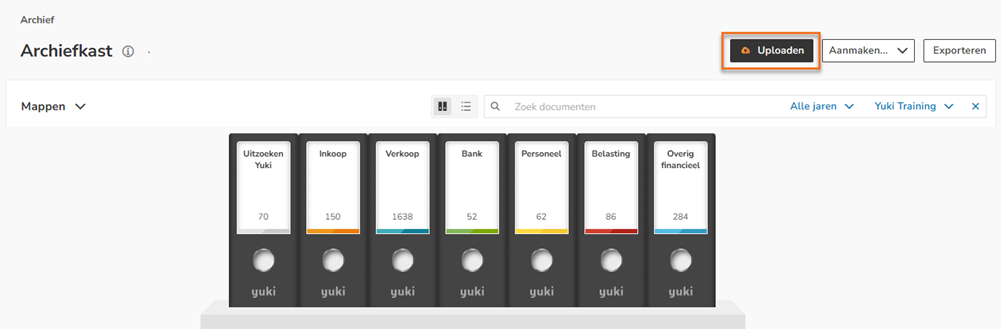
- click on the Archive icon in the navigation bar
- click on File cabinet
- in the now-opened screen, click on the Upload button.
The following screen is opened:
- click on the Browse button
- in the now-opened screen, select all the files on your hard disk to be uploaded.
- if there are multiple administrations in the domain then select the appropriate administration.
- select the To be handled by Yuki folder to have the documents processed by the back office in the administration. Select the To be filed by me folder when the documents do not need to be processed in your financial administration.

- then click on the Upload button.
All files are now uploaded into the folder one by one.
When all files have been uploaded a overview of all files appears. Check that you are not missing any files.

Upload files to specific subfolder
To upload files directly to a subfolder:
- click on the Archive icon in the navigation bar
- click on File cabinet
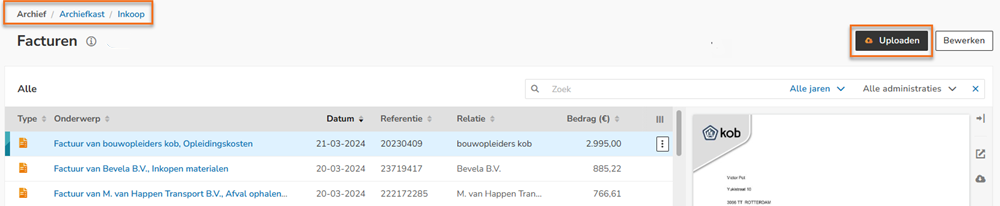
- in the now-opened screen, open the folder and then the subfolder
- in the now-opened screen, click on the Upload button.
The following screen is opened:
- click on the Browse button
- in the now-opened screen select all the files on your hard disk to be uploaded.
- if there are multiple administrations in the domain, select the correct one
- iIf necessary, select a different subfolder where the files should be uploaded
- then click on the Upload button.
All files will now be uploaded into the subfolder one by one.
Upload one document
To upload one document:
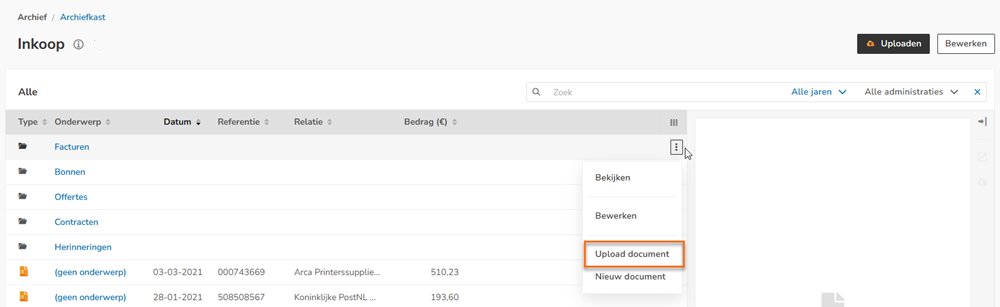
- hover your mouse over the subfolder in which the document should be uploaded
- click on the button with the three dots
- then select Upload document from the dropdown menu.
Was this article helpful?
That’s Great!
Thank you for your feedback
Sorry! We couldn't be helpful
Thank you for your feedback
Feedback sent
We appreciate your effort and will try to fix the article